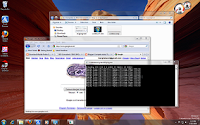
 Windows 7 have a good tool to creating a screenshot or to capture an image on desktop, and it's called snipping tool. If we are make tutorial, we need this tool to explain step by step our tutorial with an image. Good tutorial usually included image on the explanation, so everyone can understand tutorial by look at an image (screenshot).
Snipping tool support portable network graphic (PNG), GIF, JPEG, simple file HTML (MHT) file type. There are 4 kind of screenshot can made by snipping tool: windows snip, rectangular snip, full-screen snip, and free-form snip. With this tool we can edit the result of screenshot by use pen, highlighter, and eraser. Now, i will explain step by step, how to use it.
2. Click "All Programs"3. Click "Accessories"
4. Click "Snipping Tool"
5. Click and drag cursor around the area you want to capture
6. Click "File" and go to "Save As"
7. Choose location of picture file
8. Give the name of picture, select file type of the picture
9. Click "Save"
These are the result of snipping tool:
1. Windows snip
 2. Rectangular snip
4, Free-form snip


26 comments:
Thanks for your info... I really like this,, don't forget to visit my Blog okey :)
Wah,,makasih ya infonya sob...
ditunggu yang berikutnya...
hmmmm.... nice info.... thx yah.......
waduh, windows saya masih XP bos...:)
Maksih atas infonya sobat.. sayang saya pakai XP, nih.. btw.. selamat hari raya idul fitri ya..
Nice post sobat... visitme back please
Selamat hari raya Idul Adha semoga kebaikan dan keikhlasan selalu menyertai kita.. amin
lagi berpusing-pusing
To say lol about this program means to say nothing. If in XP i had to pres 1 button (Ptr Scr) to make any screen in (read cerefuly now) ANY program. But now I have to juse some lol gadget that works only on decs top. What i'm trying to say here - DON'T MAKE LIFE MORE DIFICULT.
If you take screenshots with one program and edit them with the other, you do not need such big program as Snipping Tool. I’d recommend you something smaller, for example, SnapaShot.
Pros:
- no installation needed
- in Vista and Win 7 you can make screenshots, using only 2 buttons.
Welcome to download a free version: http://nicekit.com/screen-capture/best-free-snapshot.htm
Thank you for another essential article. Where else could anyone get that kind of information in such a complete way of writing? I have a presentation incoming week, and I am on the lookout for such information
Artikel yang sangat mencerahkan. Saya sangat tertarik dengan artikel ini
good artikel
thanks for the sharing
Thank you so much it has been a wonderful help, now to make screenshot in windows 7 is definitely simple and easy by using your information. Thanks
thanks guys this information is very useful
http://yahyagan.blogspot.com
kurang ngerti -,-"
Terima kasih infonya. Kayanya lebih mudah pakai print screen deh. Habis itu di paste deh di paint. Jadi.
Mas maaf nih ganggu kalo bisa artikel hiburannya di tambah lagi dong..
:D
trims sambro...
sekalian titip link ya gan... biar dapur bisa ngebul.. trims..
Obat Flu Tulang Obat Diare Obat ISK Alami Obat Herbal Kanker Payudara Obat Maag Kronis Obat SGOT dan SGPT Tinggi Obat Herbal Kista Ovarium Obat Batu Ginjal Obat Sinusitis Alami Obat Herbal Stroke obat kanker leher rahim Obat Patah Tulang Obat Penyakit Lupus Obat Herbal Jantung Koroner Obat Batu Ginjal Penjual Obat Herbal Alami Agen Herbal Ace Maxs Obat Jantung Obat Gejala Lupus Informasi Pertanian
Terimakasih Atas Pengertiannya..
salam kenal
Kebetulan, ini yang biasa saya pake... :-D
Nice Articel succes and keep forward. Leadershipstreet Indonesia
lebih mudah ternyata :)
Makasih ya gan atas informasiny. . jangan lupa mampir balik ya disitus kami
salam sehat
Pagi gan. . ijin nyimak artikelnya nih, mantap banget tipsnya
Salam sehat & sukses terus ya gan
Ijin mampir dan nyimak artikelnya ya gan. . Nice dan semoga sukses terus
Amiin
wow great thanks.i could only use lightshot for browser capture so far
Post a Comment