Showing posts with label How to. Show all posts

Wednesday, October 24, 2012

How to Upgadre UBUNTU DESKTOP 12.04 version to 12.10 version


UBUNTU 12.10
Before we are upgrading our UBUNTU DESKTOP 12.04 to 12.10 version, we must have an internet connection to download file from UBUNTU update server. We can upgrade by following procedure.
  • Run the update-manager -d application from the Unity Dash or a command line
  • In Update Manager, click the Settings... button, and enter your password to start the Software Sources application.
  • Select the sub menu Updates from the Software Sources application.
  • Confirm the "Notify me of a new Ubuntu version:" option is set to "For any new version", and change it if otherwise.
  • Close the Software Sources application and return to Update Manager.
  • In Update Manager, click the Check button to check for new updates.
  • If there are any updates to install, use the Install Updates button to install them, and press Check again after that is complete.
  • A message will appear informing you of the availability of the new release.
  • Click Upgrade.
  • Follow the on-screen instructions. 
That's all

Click Here for Details....

What's New in UBUNTU 12.10

UBUNTU 12.10

What's new in Ubuntu 12.10?

Ubuntu 12.10 continues the evolution of the Unity interface. Here are highlights of what you can do with the latest version of Ubuntu:
New and improved features
  • Search Amazon or the Ubuntu One Music Store directly from the dash or launcher.
  • Use the new photos lens to view photos from your computer or from your social networks.
  • Browse messages from your social networks with the Gwibber lens.
  • Right click on items in the dash to see full-screen Previews with more information.
  • Enter your credentials in Online Accounts to easily set up online integration for the dash, Gwibber, Empathy, and more.
  • Keep track of contact information for your friends and colleagues with Contacts, your personal address book.
  • Get work done in style with LibreOffice 3.6, now with new, modern presentation templates and built-in support for Ubuntu's integrated menu bar.
  • Log in to remote servers from the login screen. 
(source: http://help.ubuntu.com)

Click Here for Details....

Tuesday, October 23, 2012

How to Check installed Version of Linux

The following are how to know the version of some popular Linux Distro: 
  • UBUNTU: "lsb_release -a" 
  • DEBIAN: "cat /etc/debian_version"
  • SLACKWARE: "cat /etc/slackware-version"
  • SUSE: "cat /etc/SuSE-release"
  • REDHAT: "cat /etc/redhat-release"
  • CENTOS: "cat /etc/redhat-release"
  • FEDORA: "cat /etc/fedora-release"
  • GENTOO: "cat /etc/gentoo-release"  
    Linux


Click Here for Details....

Friday, May 25, 2012

Basic Linux Command

Basic Linux Commands
cat Prints the contents of a file
cd Changes directories
chmod Changes file access permissions
cp Copies files
du Prints disk usage
emacs Edits text files
find Finds files by searching
gcc Compiles C/C++/Fortran programs
grep Searches for a string in input
less Filter for paging through output
ln Creates links between files
locate Finds files from an index
ls Lists files in the current directory
make Compiles and installs programs
man Displays manual pages for reading
mkdir Makes directories
mv Moves files
ps Lists processes
rm Deletes files and directories
ssh Connects to other machines using a secure shell connection
tail Prints the last lines of a file
top Prints resource usage
vim Edits text files
which Prints the location of a command
xargs Executes commands from its input

Click Here for Details....

Friday, January 6, 2012

How to update UBUNTU 11.10

After installing UBUNTU for my ACER Aspire 4752, i want to update this Operating System package to secure and completing my UBUNTU. These are simple step to updating UBUNTU 11.10
  1. Click "Dash Home" launcher on the left top desktop
  2. Type "update" on the search box
  3. We can show "update manager" on the search result
  4. Click "update manager"
  5. Choose package, and click "install updates"
  6. After the update and installing process finish, click close
  7. Sometimes updating process need restart or reboot system, so you i suggest to do that.
Thats all for today
Thanks

Click Here for Details....

Sunday, June 26, 2011

How to display the "run" on the Start menu in Windows 7

This is my next tips and tricks for windows 7 user. To access or running some feature in windows 7, we can use "run" feature to launch the program. For example we want to running "msconfig" feature, we can run it from "run" by typing "msconfig" in run menu. In default setting windows 7, "run" menu not show in windows 7 start menu.
The following are simple step to show "run" menu in windows 7 start menu:
  1. Right click on windows 7 icon on left bottom of desktop
  2. Click "Properties"
  3. On "Start Menu" tab click "Customize"
  4. Scroll down cursor and find "Run command"
  5. Tick "Run command"
  6. Click "OK" on the right bottom
  7. Click "OK" on the "Taskbar and Start Menu Properties"
  8. Now to access "run" menu, click windows 7 start menu, find "run" and click it
I hope this tips and tricks can help us to optimizing our windows 7

Click Here for Details....

Monday, June 6, 2011

How to disable admin user name in Joomla

To avoid someone login to our joomla website with admin username (default super administrator username in joomla) , we can disable or deactivated admin user name in joomla administrator page.
In this post i will show how to disable or deactivated admin user name.
  • Go to joomla page administrator login with default super administrator user name : admin and it's password
  • Go to user manager
  • Create another SUPER ADMINISTRATOR user name with new password
  • After new SUPER ADMINISTRATOR user name and password created, logout from that page
  • Login again with new SUPER ADMINISTRATOR username and password
  • Go to user manager
  • Down grade admin user name to administrator level or other under super administrator level
  • Disable admin user name by clicking thick icon in the "enable" column
  • Now our admin user name in Joomla has been disabled or deactivated
That's all for today, see you on next post

Click Here for Details....

Monday, September 20, 2010

How to repair "error loading feed data" in Joomla 1.5

After completing Joomla 1.5 installation process, we usually going to the Joomla administrator page. But when I go to an administrator page joomla 1.5, page load very slow, and after it finish loading page, there is an error message "Error loading feed data". In this installation process, i also installing Joomla 1.5 sample data. After googling for a while, i found how to repair these errors. Here are the steps:

  1. Go to page administrator
  2. Go to Extensions, then click on the module manager
  3. Then select the pages / tabs administrator
  4. Find a module "Joomla! Security Newsfeed"
  5. Then disable the module

Finally, logout of the administrator page and return to log in to the page, then we will not see the error message again.
Thanks.

Click Here for Details....

Wednesday, March 10, 2010

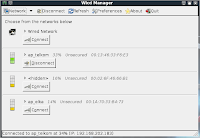
How to Setting IP address in Bactrack 4 using Wicd Network Manager

I have 1 ethernet card and 1 USB wireless LAN in my Backtrack 4 PC, so to connecting them to my network i must setting IP address for each other. This my step to setting IP address by using Wicd Network Manager:

1. Open Konsole by clicking it's icon on the bottom, or click backtrack icon and click system and then click "Konsole-Terminal Program"
2. Type "/etc/init.d/wicd start" and press enter
3. Click Backtrack icon on the bottom left of desktop
4. Go to Internet and click Wicd-Network Manager


5. To setting ip address for wire connection, click wired network
6. To setting ip address for wireless connection, click one of access point name
7. To set an static ip address and static DNS for wire or wireless click "advanced setting" and type ip address (don't forget to click "OK" :) )
8. Now we can connect to our network and happy browsing

Click Here for Details....

Tuesday, March 9, 2010

How to Install Opera Browser in Backtrack 4

After installing Backtrack 4 in my PC, i want to get another web browser for my backtrack 4. As default using Mozilla Firefox and Konqueror web browser. I want to install OPERA web browser in my Backtrack, so as usually i am trying to find Opera installer for Linux Ubuntu by asking GOOGLE (Backtrack 4 is UBUNTU based). I found this link and download opera installer file. File name : opera_10.10.4742.gcc4.qt3_i386.deb and file size is: 12.8 MB.
Now i use these steps to install that file:
1. Open Konsole by clicking it's icon on the bottom, or click backtrack icon and click system and then click "Konsole-Terminal Program"
2. Find Opera installer file
3. Type "dpkg --install opera_10.10.4742.gcc4.qt3_i386.deb" and press "enter"
and this process will appear


4. After installing process finish go to backtrack icon, and click internet and go to opera web browser
5. Opera web browser is running now
That's all


Click Here for Details....

Tuesday, January 26, 2010

How to Setting IP address in Backtrack 4

Linux Back Track 4 already released, as a beginner in Back Track i want to set my ip address for ethernet card. In windows operating system we can edit our ip address through GUI (graphical user interface), but in Back Track i can not do that.
After searching back track tutorial for beginner, i found that in back track we can set ip address by using command line in console.
These are my step to set ip address:
  1. Click Back Track icon on the left bottom of desktop (or click quick launch konsole)
  2. Type "ifconfig eth0 192.168.1.5" and press "enter" (this mean we set ip address 192.168.1.5 for ethernet card)
  3. Type "route add default gw 192.168.1.1" and press "enter" (this mean we set default get way 192.168.1.1 for this ethernet, and this is depend on our network)
  4. Type "echo nameserver 202.134.0.155 > /etc/resolve.conf" and press enter (this mean we set dns server ip address with: 202.134.0.155, and this is depend on our ISP)
  5. If finish we can check our connection by pinging our getway (in this example "ping 192.168.1.1") if this connection OK, we can see "64 bytes from 192.168.1.1: icmp_seq=1 ttl=254 time=0.961 ms" appear in our console. Time in ms depend on our network.
I hope this post can help others.


Click Here for Details....

Monday, December 28, 2009

How To Enable and Disable Windows Features in Windows 7 (seven)

This is another tricks for windows 7 (seven) users. In recently windows edition we called enable and disable windows feature with "add/remove windows component". In windows 7 (seven) we can customize ours with following next step:
  1. Click Windows icon on left bottom of screen
  2. Go to "Control Panel"
  3. Click "Programs"
  4. Click "Turn Windows Features on or off"
  5. Select windows feature that you want to enable or disable by clicking on check box
  6. Clear check box means disable features, filled box means that only part of the feature is turn on, and check on check box means enable features
  7. Don't forget to click "OK" to save your option
By enable or disable windows features we can customize our windows 7 (seven), and it's make our windows loading faster if we enable just little features.

These are windows 7 (seven) features:

  • Games
  • Indexing Service
  • Internet Explorer 8
  • Internet Information Services
  • Internet Information Services Hostable Web Core
  • Media Features
  • Microsoft .NET Framework 3.5.1
  • Microsoft Message Queue (MSMQ) Server
  • Print and Document Services
  • RAS Connection Manager Administration Kit (CMAK)
  • Remote Differential Compression
  • RIP Listener
  • Services for NFS
  • Simple Network Management Protocol (SNMP)
  • Simple TCPIP services (i.e. echo, daytime etc)
  • Subsystem for UNIX-based Applications
  • Tablet PC Components
  • Telnet Client
  • Telnet Server
  • TFTP Client
  • Windows Gadget Platform
  • Windows Process Activation Service
  • Windows Search
  • Windows TIFF IFilter
  • XPS Services
  • XPS Viewer

Click Here for Details....